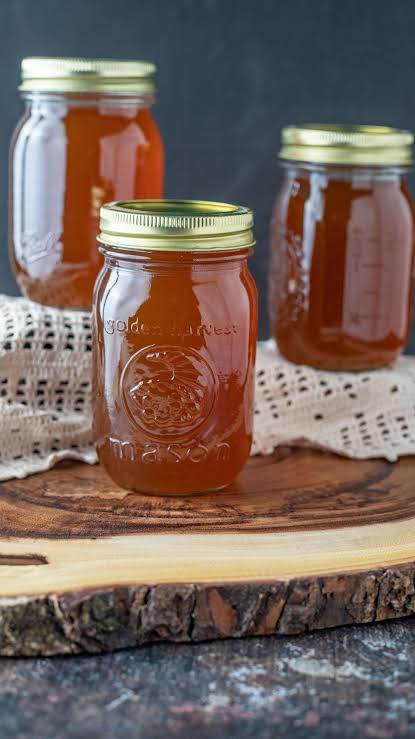
There’s nothing quite like the rich, golden sweetness of real maple syrup. Whether drizzled over pancakes or used as a natural sweetener in baking, homemade maple syrup adds depth and flavor to your favorite dishes. But if you’ve tapped your own trees or scored a bulk deal on fresh maple syrup, proper canning is essential to preserve its quality and freshness.
Canning maple syrup at home is surprisingly easy and rewarding. It ensures that you can enjoy that delicious flavor year-round without worrying about spoilage or loss of quality. The key is maintaining the right temperature and using sterilized jars to keep your syrup shelf-stable.
In this recipe, we’ll walk you through the simple process of canning maple syrup safely at home. From preparing the syrup to sealing the jars, every step is designed to ensure your final product is safe, flavorful, and perfect for long-term storage.
🕒 Cooking Time & Serving
- Preparation Time: 10 minutes
- Heating Time: 10–15 minutes
- Total Time: 25 minutes
- Yields: Varies depending on quantity (typically fills 6–8 half-pint jars from 1 gallon of syrup)
- Serving Size: 2 tablespoons
🧂 Ingredients
- Maple syrup – fresh, preferably Grade A
- Canning jars – sterilized (half-pint, pint, or quart jars)
- Lids and rings – new, clean, and dry
- Large pot or water bath canner
- Candy thermometer – to monitor syrup temperature
- Clean funnel and ladle – for easy transfer
👩🍳 How to Make Maple Syrup for Canning
Step 1: Prepare the Jars and Equipment
- Wash and sterilize your jars, lids, and rings in hot soapy water.
- Place jars in boiling water or a dishwasher on the sterilize setting.
- Keep jars hot until ready to fill to prevent thermal shock.
Step 2: Heat the Maple Syrup
- Pour the maple syrup into a large pot.
- Heat slowly over medium heat to 180°F – 185°F (82°C – 85°C).
- Use a candy or kitchen thermometer to monitor the temperature. Avoid boiling.
Step 3: Fill the Jars
- Using a funnel and ladle, carefully fill each hot jar with the heated syrup.
- Leave ¼ inch headspace at the top.
- Wipe the rims clean with a damp cloth.
Step 4: Seal the Jars
- Place lids and screw on the rings until fingertip tight.
- Do not over-tighten.
Step 5: Water Bath Process (Optional for Extra Safety)
- Submerge jars in a boiling water bath for 10 minutes (optional but recommended).
- Remove and let cool undisturbed for 12–24 hours.
Step 6: Check Seals and Store
- After 24 hours, press the center of each lid. If it doesn’t pop, it’s sealed.
- Store in a cool, dark place. Refrigerate after opening.
📝 Notes
- Storage: Properly canned syrup lasts up to 1 year unopened. Opened jars should be kept in the fridge and used within 6 months.
- Temperature matters: Overheating the syrup can alter its flavor and consistency.
- Cloudy syrup? It’s likely sugar sand (minerals). You can filter it through cheesecloth before canning.
❓ FAQs
Q: Do I have to process maple syrup in a water bath?
A: It’s not strictly required if jars are hot and properly sealed, but water bath processing adds an extra level of safety and shelf stability.
Q: Can I use store-bought maple syrup?
A: Yes! This method works with both homemade and store-bought syrup, as long as it’s pure maple syrup (not pancake syrup).
Q: How can I tell if my syrup went bad?
A: Look for mold, off smells, or fermentation bubbles. If in doubt, discard it.
Q: Can I reuse lids?
A: No. Always use new lids for safe canning to ensure a proper seal.
🧾 Nutrition Information
| Nutrient | Per 2 tbsp (30ml) Serving |
|---|---|
| Calories | 110 |
| Total Fat | 0g |
| Sodium | 2mg |
| Total Carbohydrates | 27g |
| Sugars | 24g |
| Protein | 0g |
| Calcium | 4% DV |
| Potassium | 42mg |
Values are approximate and may vary depending on syrup grade and source.
⚠️ Disclaimer
This recipe is for general informational purposes only. While maple syrup is a natural sweetener, it is high in sugar and should be consumed in moderation. Individuals with diabetes or specific dietary restrictions should consult a health professional before consumption. Always check for food allergies, and ensure jars are properly sealed to prevent foodborne illness.

Leave a Comment